App Store Connect Help
App Store Connect Manage builds View builds and metadata
View builds and metadata
You can view all the builds you've uploaded for your app, including the metadata for each of these builds. This information covers the size of variants created by Apple and the progress of build delivery.
Note: Some builds may no longer appear after the app is released.
Learn how to get build information with the App Store Connect API.
Required role: Account Holder, Admin, App Manager, or Developer. View role permissions.
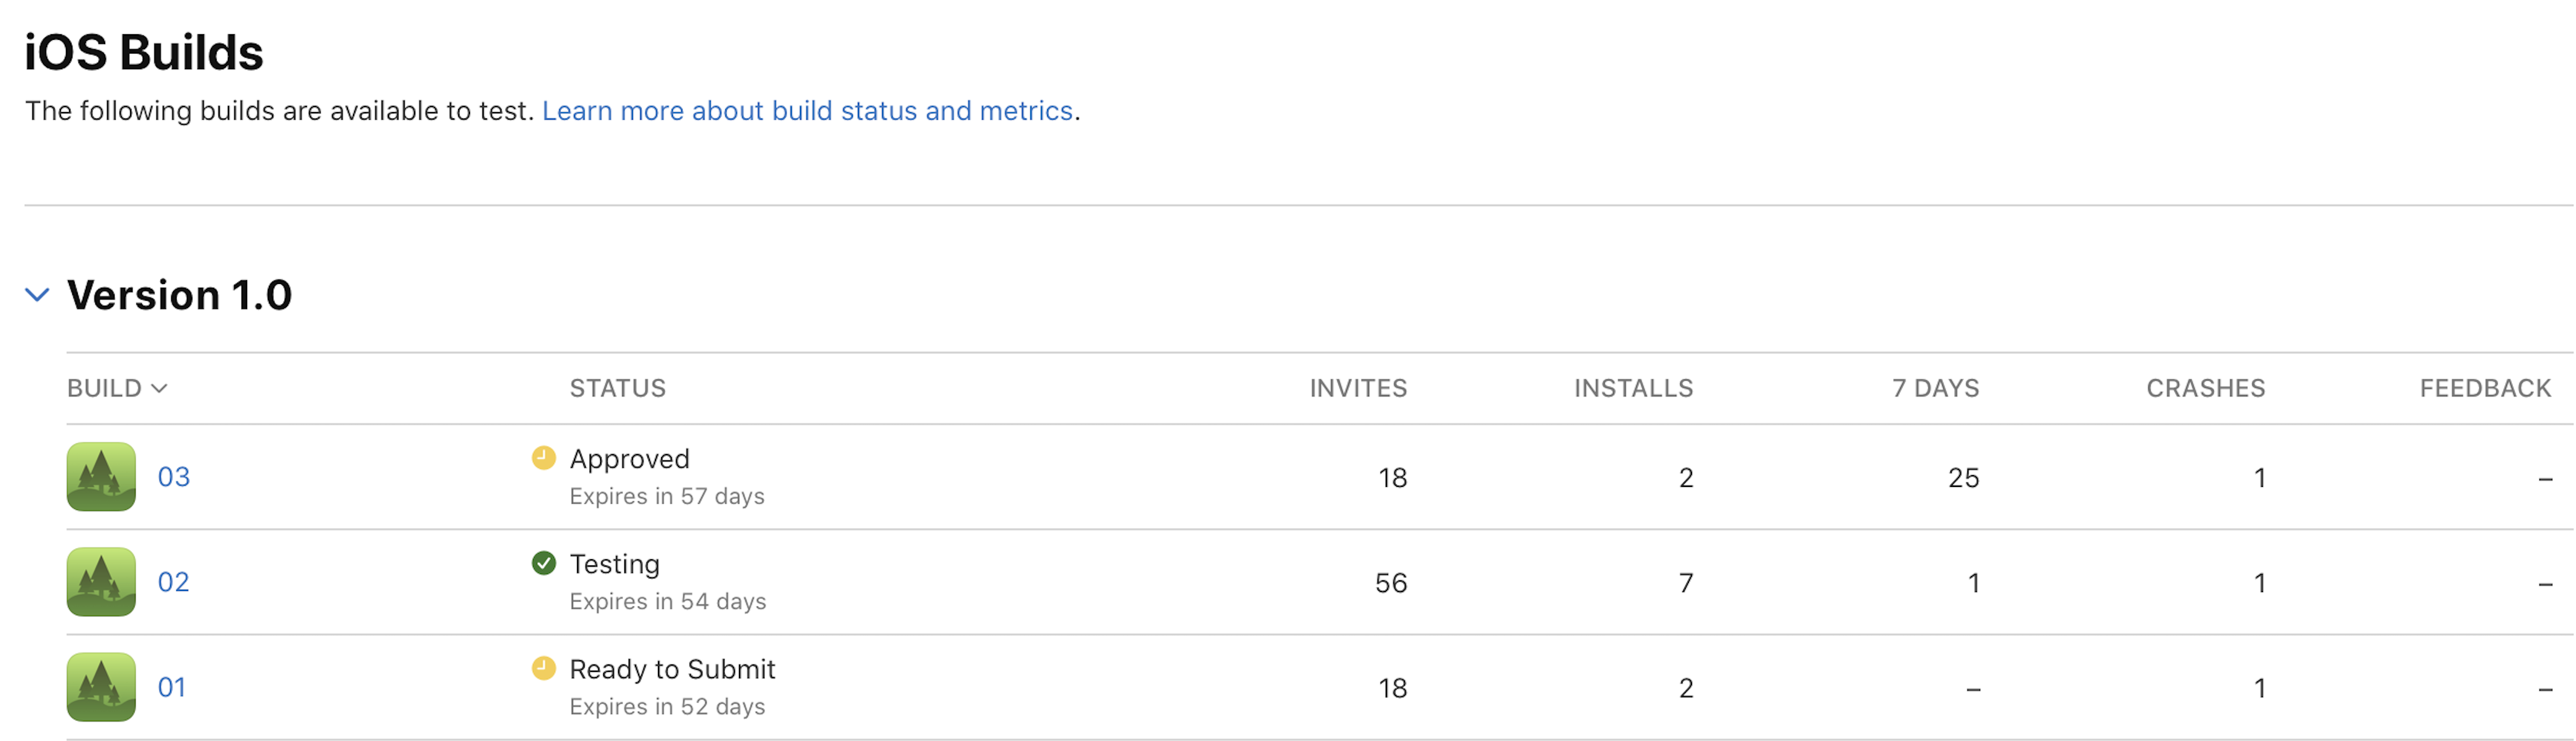
View build metadata
-
In Apps, select the app you want to view.
-
Click the TestFlight tab to view all builds.
-
In the sidebar, select the platform you want to view build metadata for.
Note: Builds are organized by version number. To view the builds you uploaded for each version, click the disclosure triangle next to the version number. To view build groups, click the build number.
-
To view a build's metadata, select the app icon or build string in the expanded table under the version number in the Build column.

-
In the build page, click the Build Metadata tab.
The Build Metadata page displays the file sizes of a build, such as the compressed file size, essential content size, additional in-app content size, and other build-related information.
View the file sizes of a build
After you upload a build to App Store Connect, it goes through app thinning, a process that creates variants of your app for different devices and operating system versions. You can view the amount of space a variant occupies on the customer’s device directly in App Store Connect.
Note: When your app is approved for distribution, it’s encrypted with Digital Rights Management (DRM) and recompressed. The app file size for your binary may be larger than it’s for the binary you uploaded in App Store Connect. The exact final size for your app can't be determined in advance.
-
In Apps, select the app you want to view.
-
Click the TestFlight tab to view all builds.
-
In the sidebar, select the platform for which you want to view builds.
-
To view a build’s file size, select the app icon or build string in the expanded table under the version number in the Build column.
-
In the build page, click the Build Metadata tab.
-
Under General Information, click App File Sizes.

A table appears displaying the different variant sizes.
-
The device type is the target device for the variant. Universal refers to the variant that runs on all supported operating systems and target devices that are delivered to customers running iOS 8 or earlier, apps purchased in volume through Apple School Manager and Apple Business Manager or through Mobile Device Management (MDM), or apps downloaded using iTunes 12.6 or earlier.
-
The install size is the amount of disk space the app consumes on the customer’s device. The install size also appears on your app’s product page in the Information section.
-
The download size is the compressed size of the app that’s downloaded over the air, using cellular bandwidth or Wi-Fi.
-
If any of the device variant sizes exceed the 200 MB over-the-air download limit, a yellow warning icon appears next to the build string in the Builds table and next to the variant size in the App File Sizes table. Click the warning icon to read the full warning. Apple also sends you an email with this information.
View build upload status
You can view a build’s version and build number, upload status, and creation date under the Build Uploads section in App Store Connect. The upload status provides detailed insights into delivery progress, including warnings, errors, and other information.
If the upload status of a build is unclear, submit a Feedback Assistant ticket (Developer Tools & Resources > TestFlight) or contact us. Be sure to include details like version and build numbers, upload date and time, and relevant logs, in your issue report.
-
In Apps, select the app you want to view.
-
Click the TestFlight tab to view all builds.
-
In the sidebar, select the platform for which you want to view builds.
-
To view a build’s delivery progress, expand Build Uploads and refer to its status under the Status column.
 Tip: Use the All Statuses dropdown at the top right of the Build Uploads table to filter by status.
-
Select the status to view details of any errors, warnings, or information. If your build shows a Failed status, resolve all issues before re-uploading.
Note:
-
For builds with a Complete status, you can access more details (including metadata) by selecting the build string in the Version & Build column or clicking Complete.
-
Even if the status is Complete, there may still be warnings or other details you should review and address before your next upload.
-
If you upload a build and it remains in the Processing state for more than 24 hours, there may be an issue. To resolve the issue, submit a Feedback Assistant ticket or contact us.
-
The table below provides detailed information about the various build upload statuses.
|
Status |
Description |
|---|---|
|
Awaiting Upload |
A build delivery has been initiated and Apple is waiting for you to upload the build. |
|
Processing |
Your build upload is still being processed. You'll receive an email notification and the table under Build Uploads will display an updated status when your build has finished processing. If you upload a build and it remains in the Processing state for more than 24 hours, there may be an issue. To resolve the issue, submit a Feedback Assistant ticket or contact us. |
|
Failed |
Your build upload has finished processing, but encountered an issue. Select the build to view potential errors, warnings, and information associated with the failure. Ensure to resolve all errors prior to re-uploading your build. Note: If the build upload fails, you can reuse the same build number for your next upload. |
|
Complete |
Your build upload has processed successfully and is now ready for testing. Note: If there is a warning badge next to this status, review possible warnings or other information before your next upload. |
Note: In addition to status updates in App Store Connect, you’ll also receive email notifications when your build is Processing, Failed, or Complete.
View the device requirements for a build
Apple calculates the minimum operating system version required for your app to run based on your build settings. You can verify a build's device requirements on the Build Metadata page.

-
The Minimum iOS version is the MinimumOSVersion provided in your build.
-
The Minimum macOS version is the minimum version of macOS required for your app to run, as determined by Apple.
Apple automatically calculates the minimum macOS version using the LSMinimumSystemVersion provided in your build, if applicable, and the closest related macOS for the MinimumOSVersion provided in your build. If you’ve selected a minimum macOS version in Pricing and Availability and the value is higher than the LSMinimumSystemVersion or the closest related macOS for the MinimumOSVersion, this version will be shown instead.
-
The LS Minimum System Version is the optional LSMinimumSystemVersion provided in your build.
Download dSYM files
If you include bitcode when you upload your app to App Store Connect, Apple generates debug symbol (dSYM) files, which you’ll need to download in Xcode or App Store Connect before you can view logs in Xcode.
Note: Starting with Xcode 14, bitcode is no longer required for tvOS or watchOS apps. Apple no longer accepts bitcode submissions from Xcode 14. dSYM files can only be downloaded for existing bitcode submissions and are no longer available for submissions from Xcode 14 or later.
Learn how to analyze crash reports using dSYM files.
In App Store Connect, to download dSYM files for a build:
-
In Apps, select the app you want to view.
-
Click the TestFlight tab to view all builds.
-
In the sidebar, select the platform for which you want to view build metadata.
Note: Builds are organized by version number. To see builds you uploaded for each version, click the Versions tab, then expand the disclosure triangle next to the version number. To view build groups, click the Build Groups tab.
-
To view a build's dSYM files, select the app icon or build string in the expanded table under the version number in the Build column.
-
In the build page, click the Build Metadata tab.
-
Under General Information, click Download dSYM.
